15/3 - Downloading DaVinci Resolve
- 2004946
- Mar 15, 2022
- 2 min read
Updated: Mar 22, 2022
Today I decided to download DaVinci Resolve for free to try and practise using professional equipment used by real colourists in the film industry.
I could play it safe and use Premiere Pro to colour grade my footage, as that is the software I am familiar with but I really want to push myself and my ability to learn new software and techniques. If I find that when I reach the point of editing and I still have no idea how to use it, I will go back to Premiere, but I will definitely try my best to learn this new software.
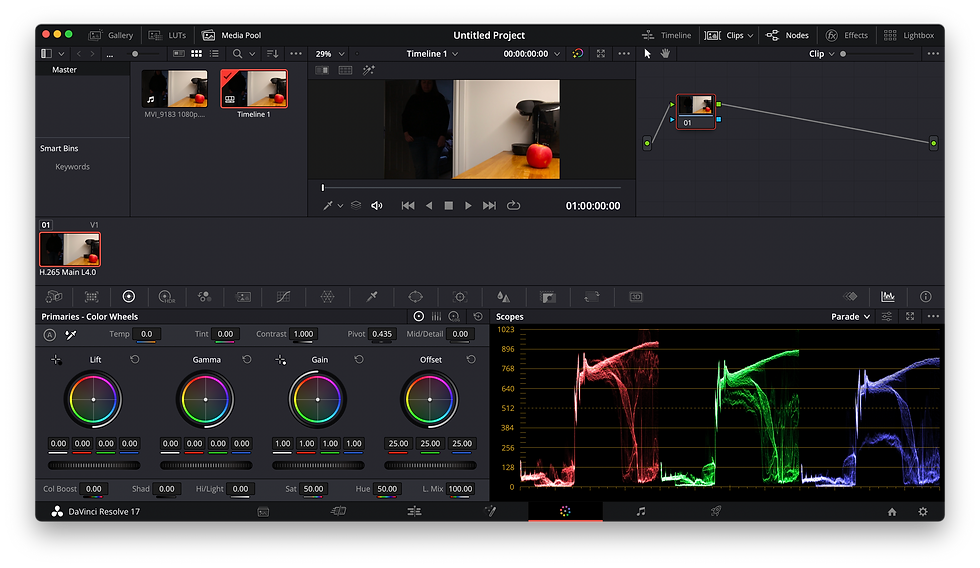
I have never used DaVinci resolve before, nor have I ever seen someone use DaVinci Resolve, so I spent all day watching YouTube videos to just learn the basics. It is slightly similar to Premiere Pro, as essentially they use the same features, but it is a lot more advanced and complicated.

An overview of how DaVinci Resolve looks.
Overall:
Watching these YouTube videos has also made me realise how much my editing process in itself needs improving, as I don’t use as many layers as I should, and there are a lot of things I need to learn. It is very different to Premiere Pro and a lot more complicated, so I will spend the next couple days/weeks experimenting with different clips, and trying to get used to using it.
Extra Things:
Here’s some shortcuts and things I have learnt from watching them that will be useful for future projects:
B (Blade Tool)
Command + B (Cut Footage)
Shift + Delete (Ripple delete - delete footage and gap left at the same time)
Command + Shift + ] (Ripple edit right)
Command + Shift + [ (Ripple edit left)
Option + S (New Serial Node)
I (In Point)
O (Out Point)
^To pre-cut footage in the preview panel
N (Next)
P (Previous)
+ (
-(delete)
Exporting:
HD (Restrict to 40000Kb/s)
4K (Restrict to 80000Kb/s)


Comments